
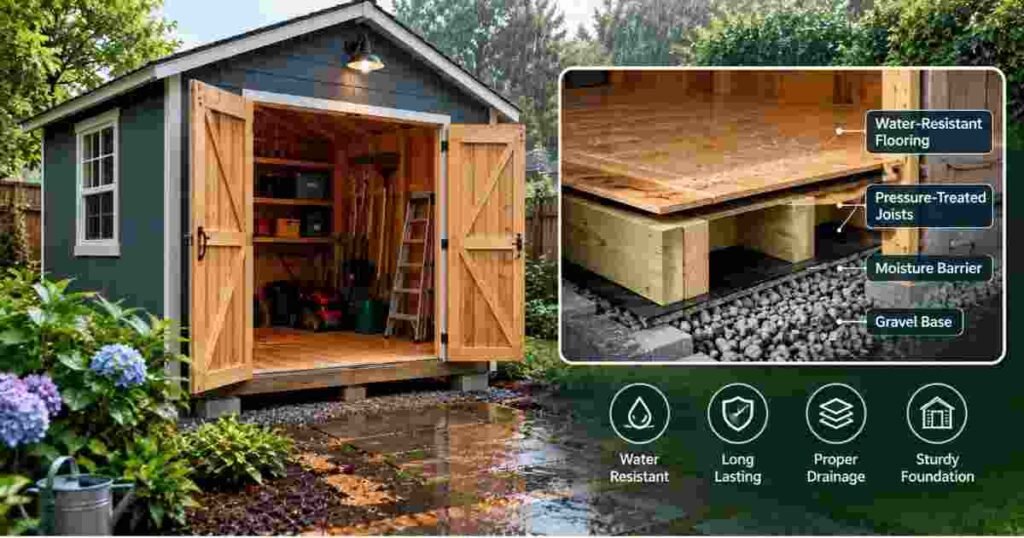
Most sheds don’t fail at the roof. They fail from the bottom up. You walk in one spring morning, step near the doorway, and feel that soft sponginess under your boot. That’s rot, and it started two or three winters ago when water got trapped somewhere you couldn’t see.
Thank you for reading this post, don't forget to subscribe!A shed floor takes abuse from both sides. Rain blows in through the door, snowmelt soaks the ground underneath, and humidity rises off bare soil all summer long. Get the floor right, and the rest of the structure usually looks after itself. Get it wrong, and you’ll be rebuilding in five years.
Start Below the Floor, Not With It
Here’s the part people skip. The single biggest cause of shed floor rot isn’t the decking material. It’s standing water underneath.
Your shed needs a gap between the joists and the ground. Four inches is a reasonable minimum; six is better. That air gap lets moisture evaporate instead of sitting against the underside of your boards. Concrete blocks, pressure-treated skids, or precast pier blocks all work. Just make sure they’re level and bedded on compacted gravel, not loose topsoil that’ll shift by March.
Drainage Comes First
Before anything gets built, look at where water goes when it rains hard. If your shed site collects runoff from a slope or sits in a natural dip, no amount of good carpentry will save it. Dig a shallow swale to divert flow, or raise the whole pad with four to six inches of compacted crushed stone. Number 57 gravel is the standard choice, and it drains fast.
One practical tip: lay down landscape fabric before the gravel. It stops weeds from pushing up and keeps fine soil from clogging the stone over time.
Choosing Your Floor Material
This is where budgets and ambitions collide. You’ve got roughly three realistic options, and each behaves differently once the weather turns.
Pressure-treated plywood: Common, affordable, widely available in 3/4-inch sheets. It handles damp conditions reasonably well but swells at the edges if water pools on the surface for days.
Tongue-and-groove OSB: Cheap and rigid. Also the fastest to fail if it gets properly wet. Fine for a dry climate, risky anywhere with real winters.
Resin-coated panels: The step up. Phenolic resin bonded to the face creates a hard, sealed surface that shrugs off water, mud, and dragged mower wheels.
That third option deserves a closer look. A sheet of phenolic faced plywood has a dark film coating fused onto birch or poplar core veneers under heat and pressure. It’s the same stuff used for concrete formwork and truck bed liners, which tells you something about how much punishment it takes. Spilled fertilizer wipes off. A wet bike tire leaves no mark. Standing water doesn’t soak in.
It costs more per sheet, obviously. But spread across fifteen or twenty years of service, the math tends to favor it, especially if you store anything you care about.
Framing That Doesn’t Trap Moisture
Use pressure-treated lumber for every joist, rim board, and skid. All of it. The small savings from untreated framing disappear the first time a joist end wicks water from a block.
Space joists at 16 inches on center for general storage. Drop to 12 inches if you’re parking a riding mower or storing heavy bagged material. Floors flex more than people expect, and flexing joints open gaps where water sneaks through.
Seal the Edges and Fasteners
Cut edges are the weak point on any panel. The face may be sealed, but a fresh saw cut exposes the raw core. Brush on an exterior-grade edge sealer or two coats of oil-based primer before the sheet goes down. It takes twenty minutes, and it’s the difference between a floor that lasts and one that delaminates at the seams.
Use hot-dipped galvanized or stainless screws, never bright steel. Countersink them slightly and dab sealant over the heads. Each screw hole is a tiny channel straight into the panel core.
Keeping Water Out Long Term
Finish the job with details that redirect water away from the structure. A small threshold ramp sheds rain outward rather than letting it run inside. Extend your roof overhang at least six inches past the walls. Gutters with a downspout pointed well clear of the base make an enormous difference during a week of steady rain.
Check the floor every spring. Look for discoloration, lifted edges, or soft spots near the door and corners. Catching a small problem in April beats replacing three joists in October.
Build it right once, and your shed floor becomes the part you never think about again. That’s the goal.